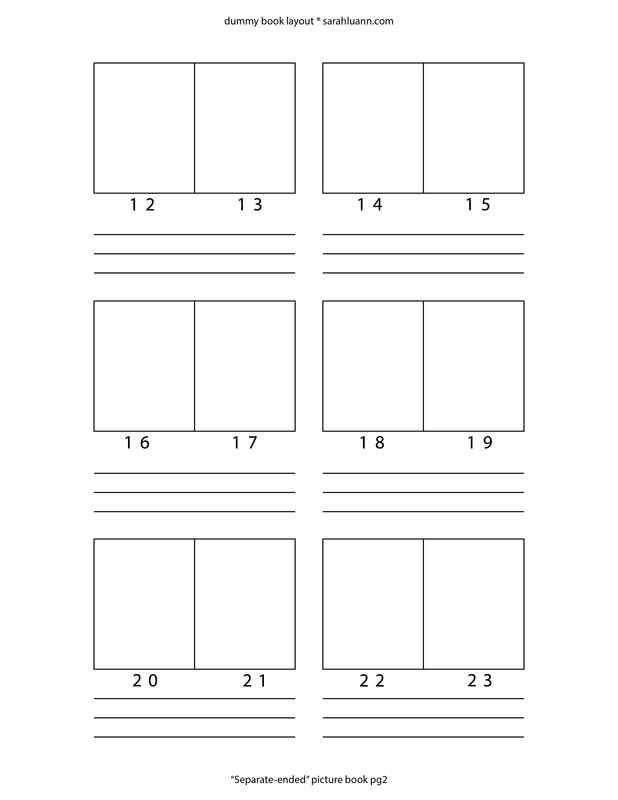
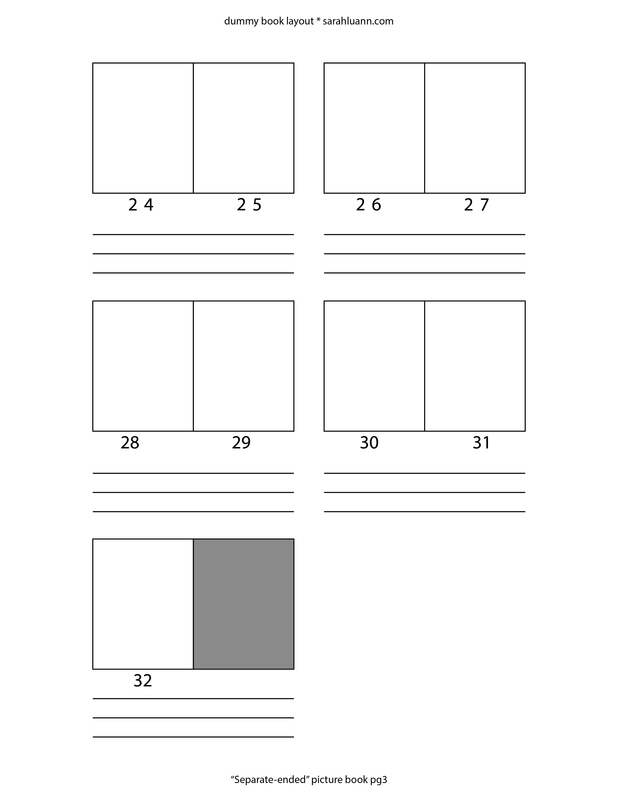
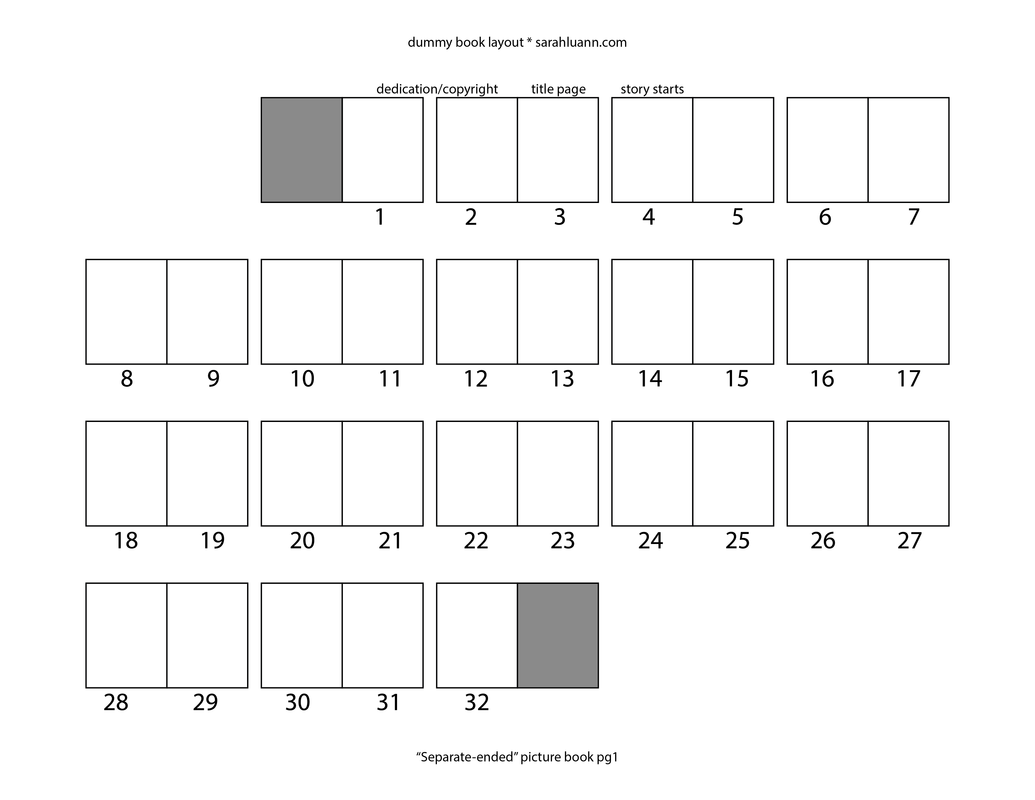
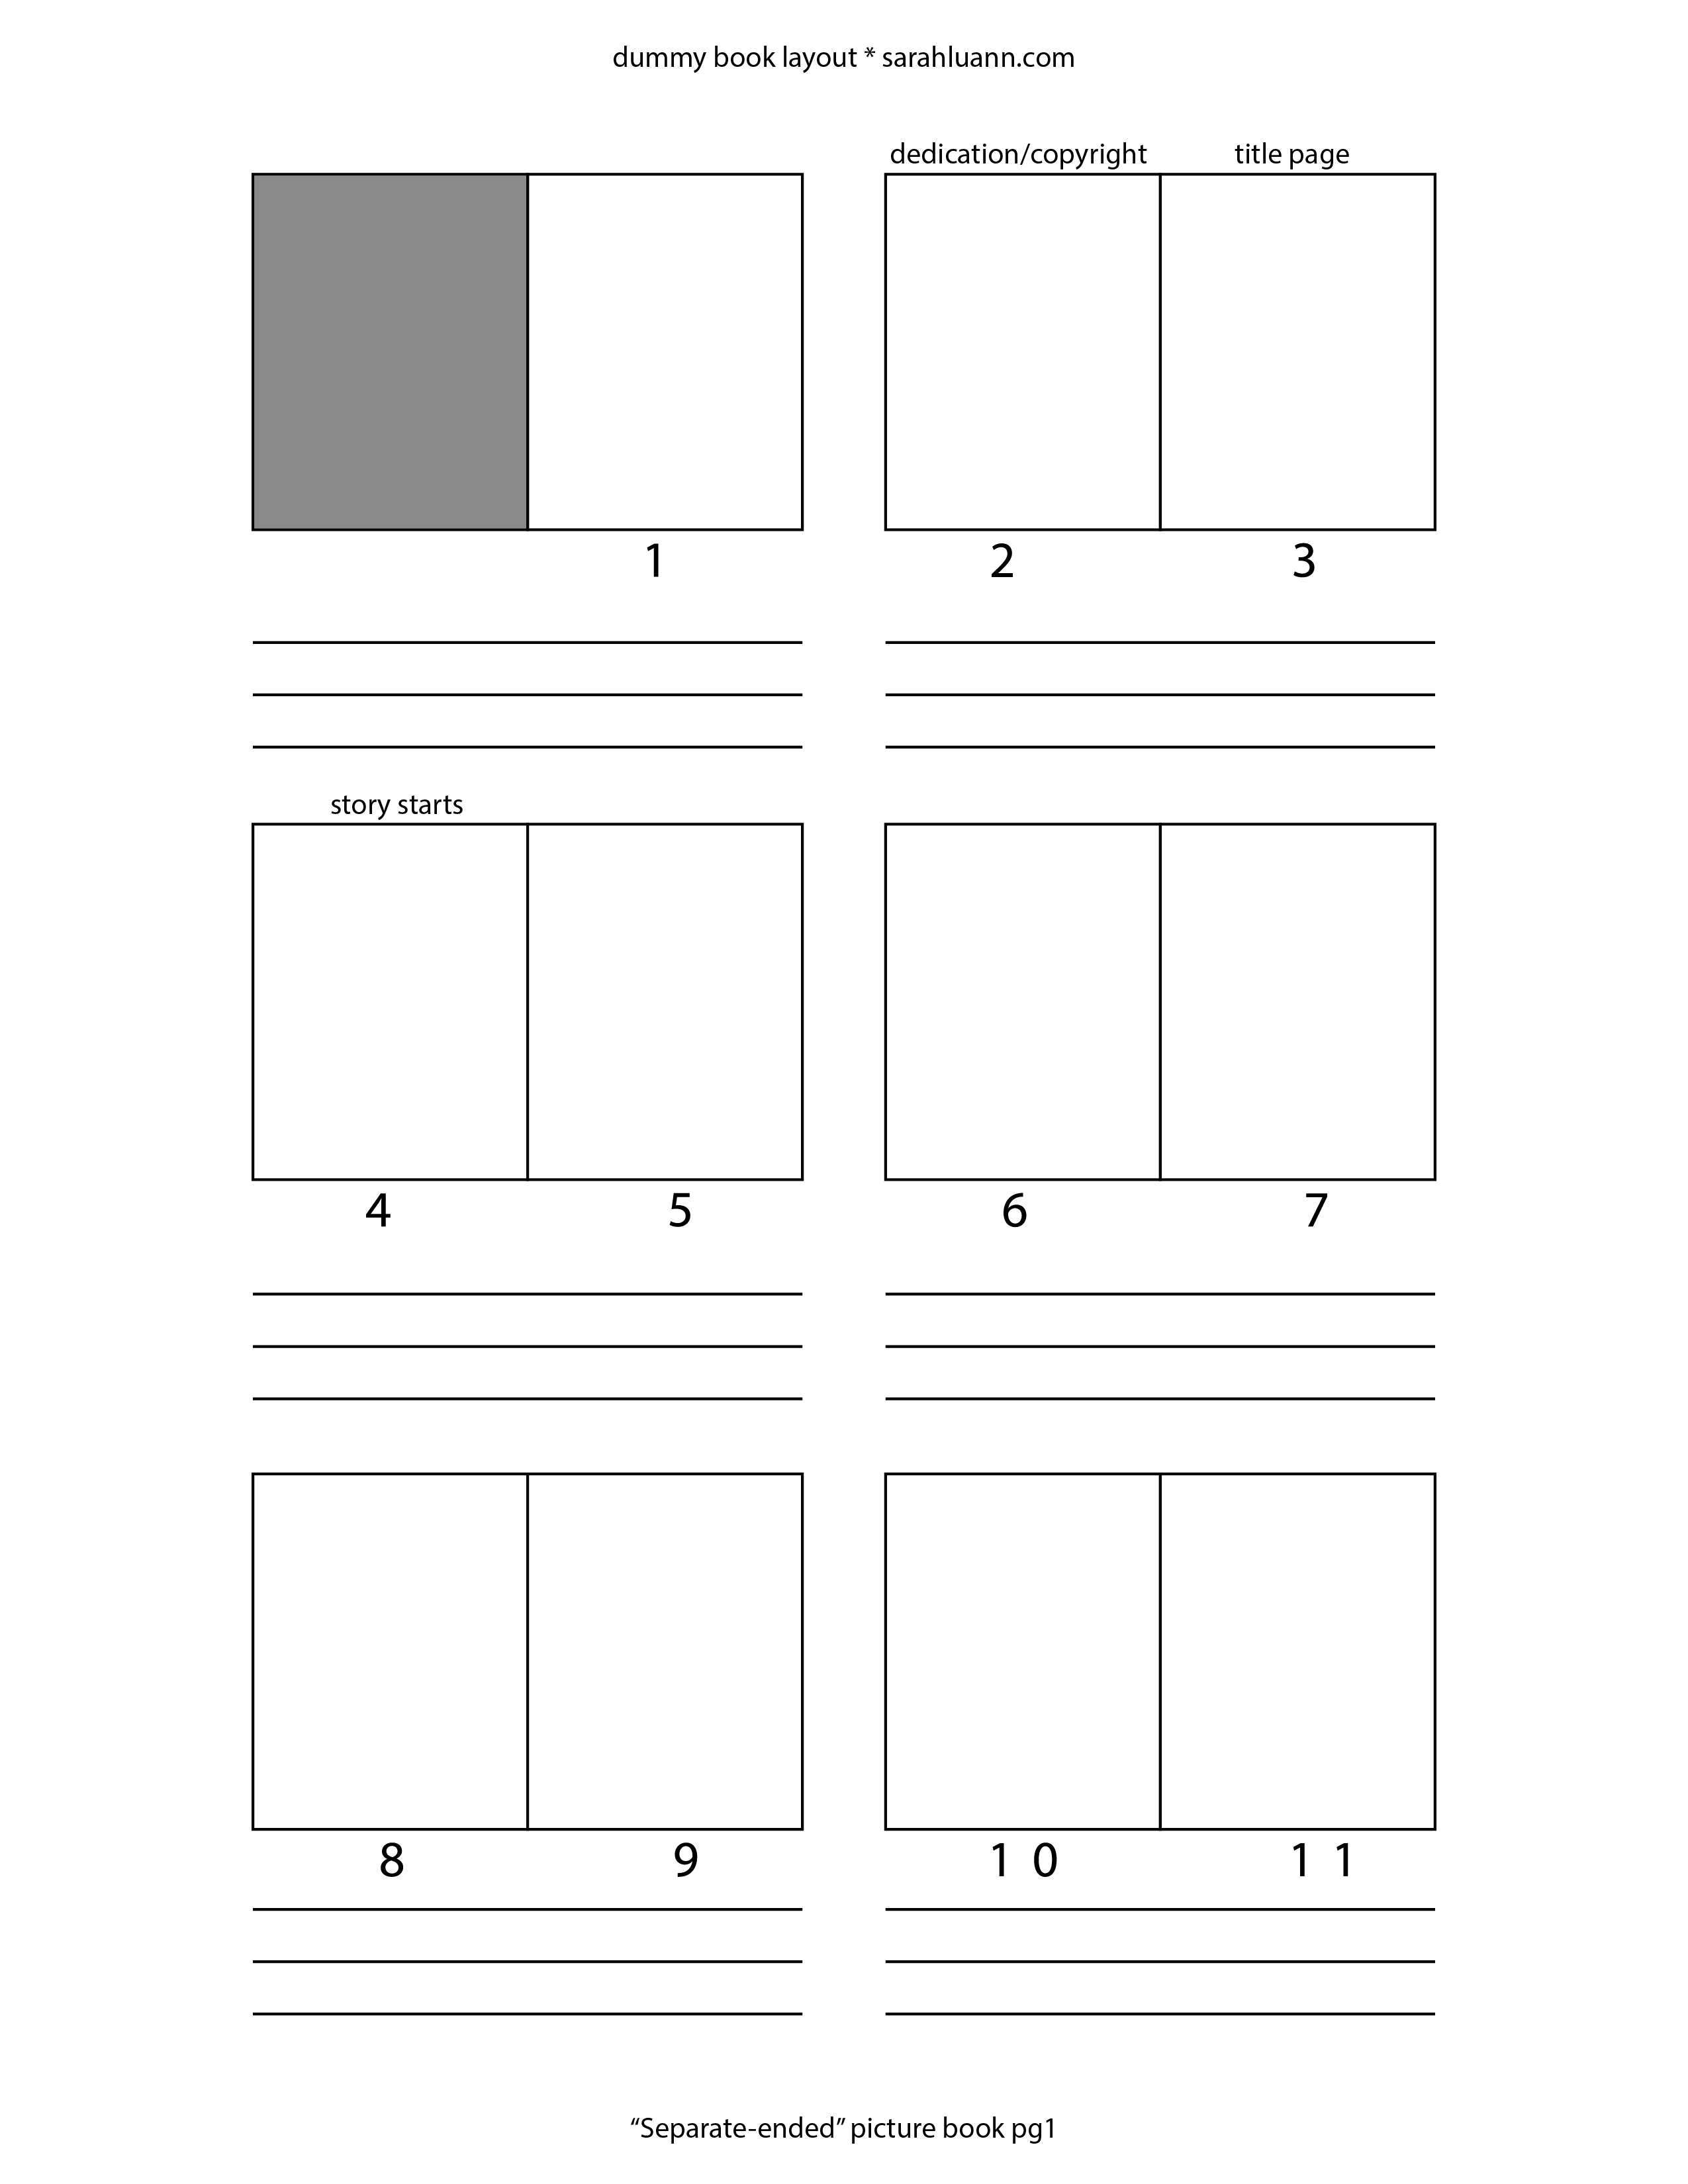
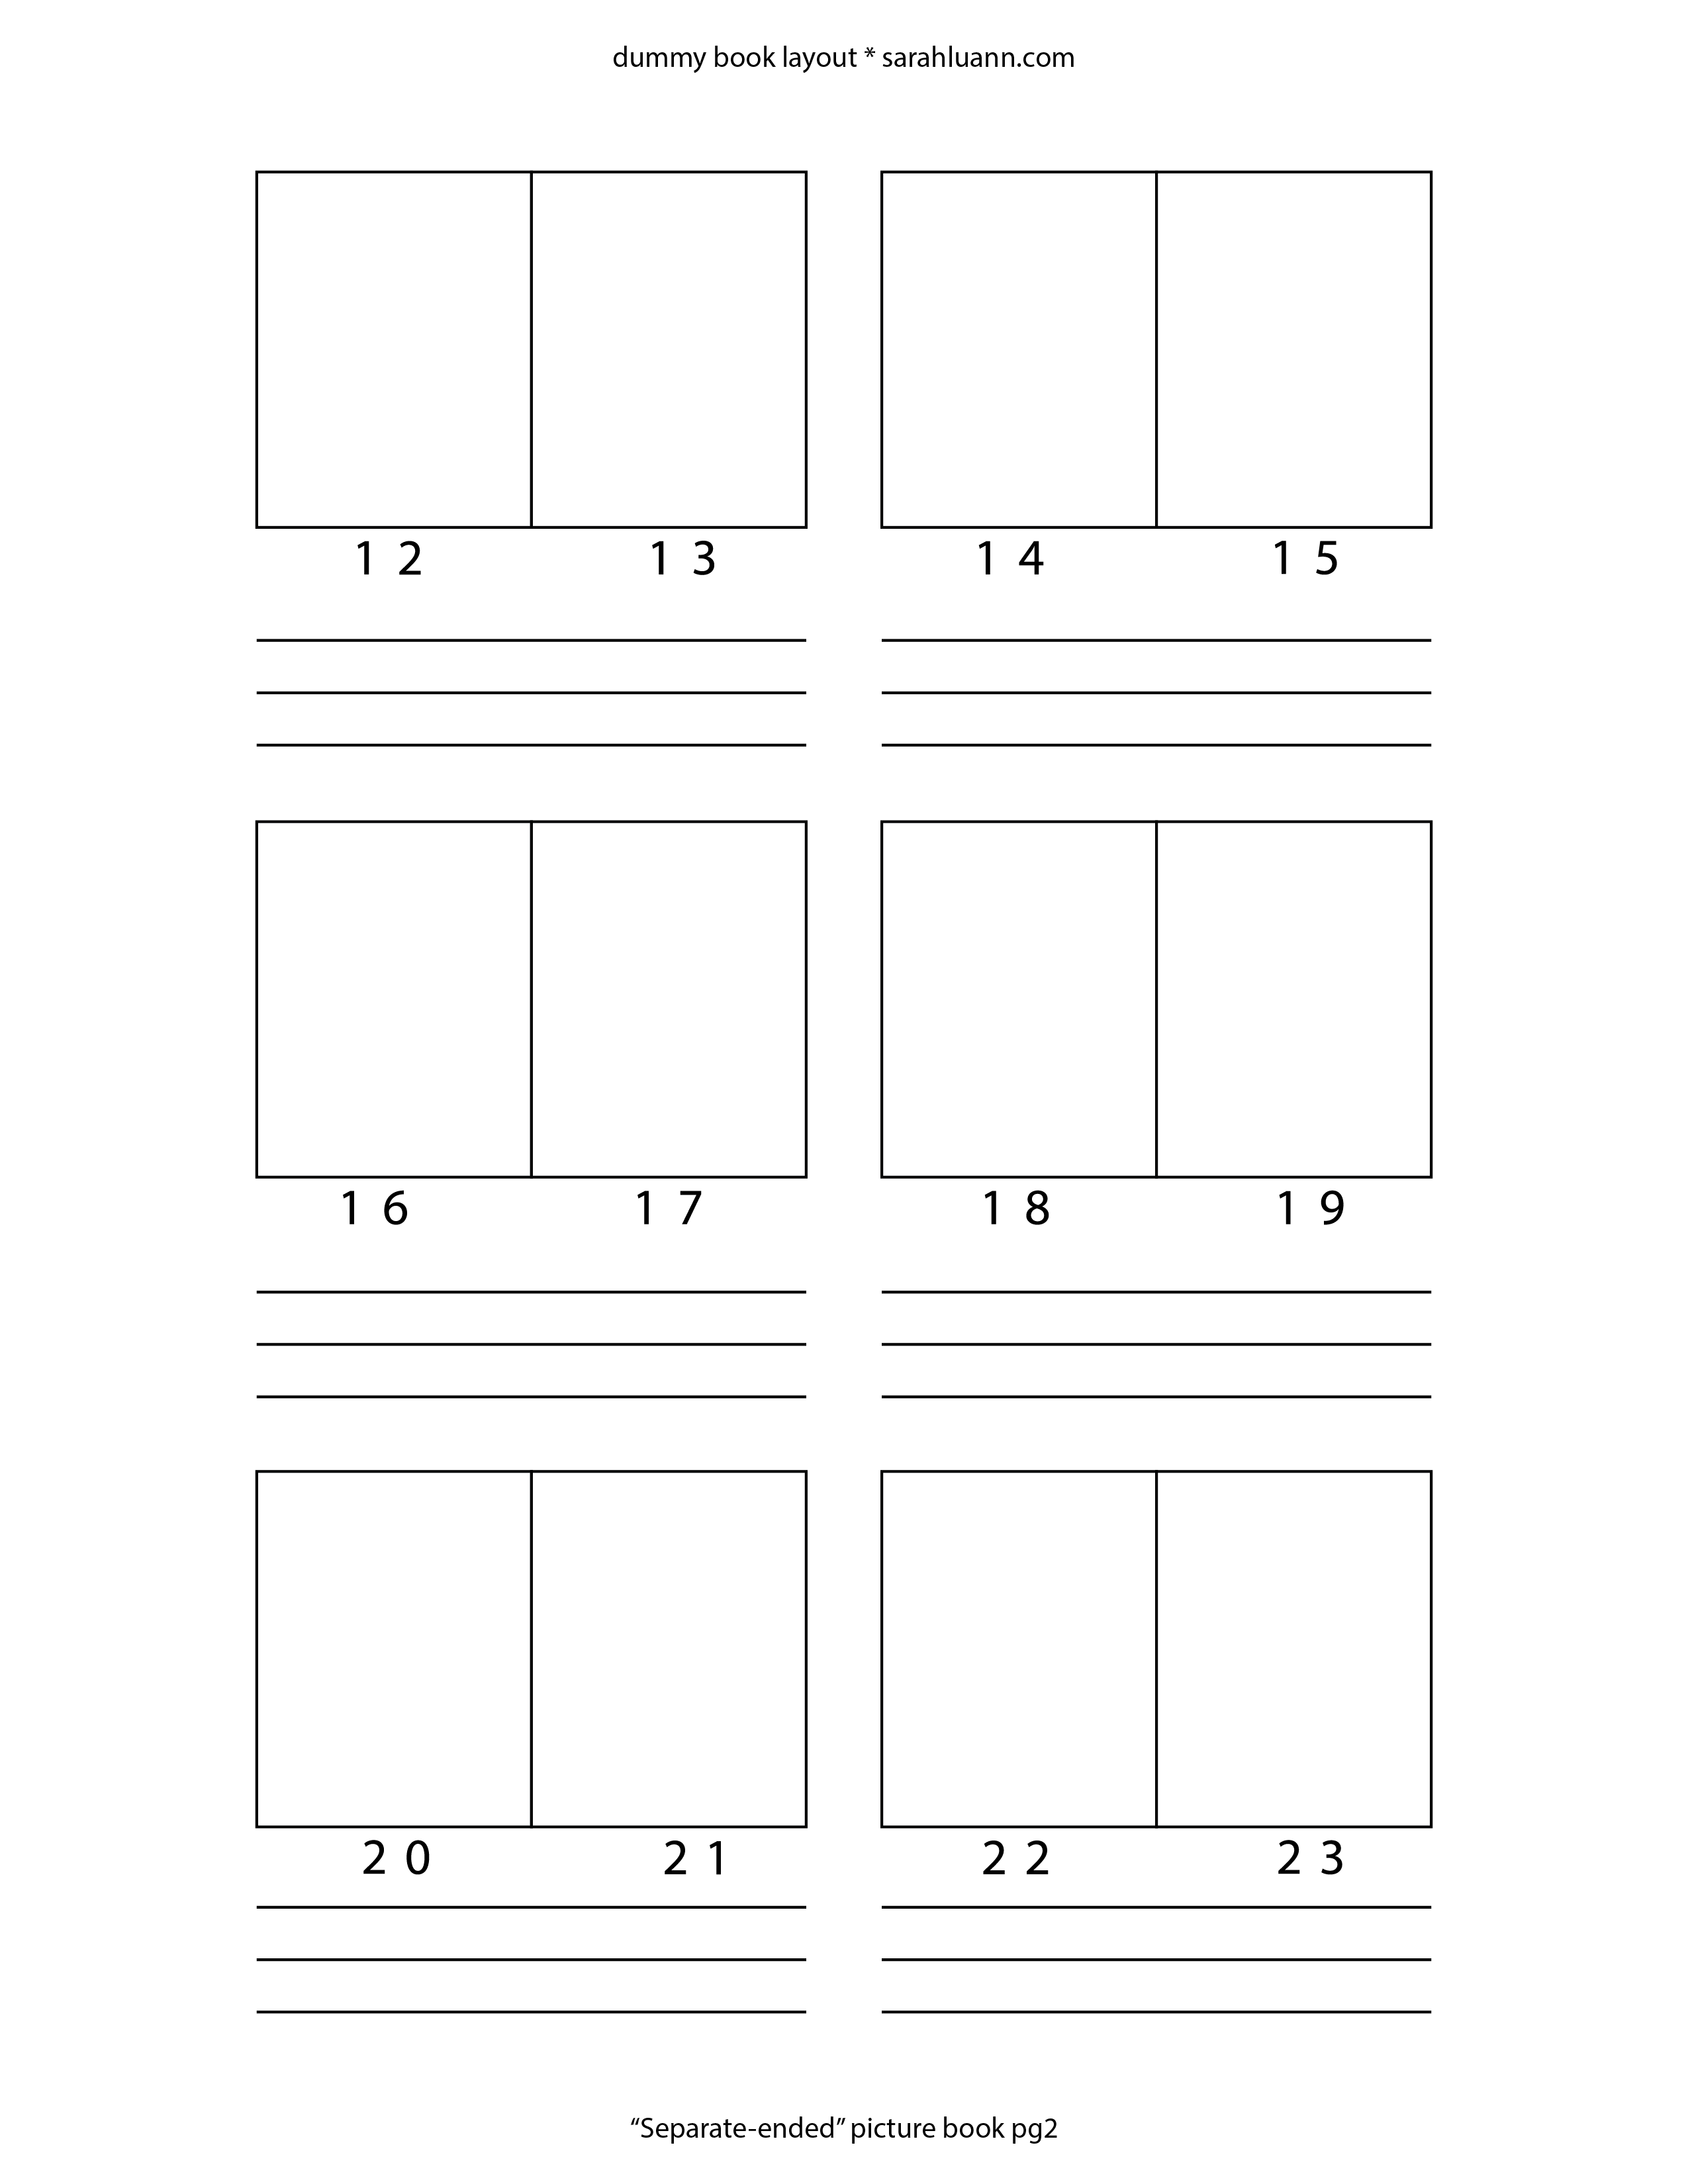
I'll be heading up to the Green Leaves SCBWI retreat tomorrow, and though I have a couple stories in progress, I really don't feel they are ready for an official critique--I'm going for a portfolio critique, and I'll continue to work on my stories until I have them in a good place. Speaking of getting them in a good place, I do think it's time to start figuring out how the story will flow and get some thumbnails, particularly for my wordless story. I searched online for a nice dummy book layout to print, but didn't see one to my liking. Either they were colored (why??? I just need some squares) or they didn't have space to write notes, which I wanted. So like any self respecting graphics-savvy person, I just made it myself. And I thought I'd make these available to anyone else who might be looking for the same things I was in a dummy layout. Feel free to print and use these as you need. If you like them feel free to share, but I would appreciate if you kept my information on them intact. Happy sketching! ![]()
![]()
![]()
![]()
0 Comments
So, this post is late. Not just a day late-two whole days late. How could I do such a thing? Well, on Monday I was very, very sick. I don’t think I even touched my computer that day--that sick. I didn’t do much of anything that day, actually. Then Tuesday was a recovery and catch-up day. So that brings us to Wednesday. But I AM here, and I’m getting this post up. Better late than never, right? And this is going to have to be another 2-week-er. Because that is how my life is going around now. Envelope drawings were fun this last week. I did mine in ball point pen, which is really a comfort sketching medium for me--yes, I’m more comfortable sketching in pen than in pencil. My highschool teacher had us always sketch in pen and I got used to it. The nice thing about ball point pen is that you can push soft for a light line, and push hard for a dark line. In some of these my “envelope” lines are more visible than others, but you’ll just have to trust me on this one--I drew an envelope for these. This week I want to start transitioning into skills that will help you (and me!) draw from imagination. Most of the exercises we’ve done so far really depend on having your subject right in front of you. But I’m an illustrator, and I can’t always find a real live three dimensional example of what I am drawing. I have to use my knowledge built up from drawing from life (As we’ve been doing for the last few weeks, right?) to imagine how something might look. So this week I’ve decided to try an exercise I’ve actually never done before, but seen recommended elsewhere. I’m hoping that it will be as helpful as I’ve heard it is. If not, well, I’ll keep looking for something to teach these principles. Everything we see can be simplified into combinations of certain basic 3-dimensional forms. Legs can be simplified to cylinders, an apple is basically a sphere, a book is a box shape, etc. Understanding these basic types of forms and how they occupy space can help us to simplify the things we imagine into manageable forms we can understand and draw. So this week, we’re going to get to know those forms. Find or make each of these, all in one color: a cone, a cylinder, a sphere, a box or cube, and a pyramid. I will make some paper patterns (except I can’t really do a sphere), but you may have things around the house that will work--just wrap a can of soup in paper and you have a white cylinder. A white ping pong ball needs no alteration, there is your sphere. They don’t even need to be white, but I would prefer that they are all one solid color, so that the form differences are the important thing, rather than color or value or pattern. Each day, draw three or more of your forms at different angles and arrangements. Pay attention to what happens to each face when they are above your eye level versus below, How they look when stacked on top of each other, in different lighting situations, etc. Be creative. Since we are mostly worried about the forms, don’t get too caught up in the shading--you can make an indication of where the shadows are, but don’t spend forever on this. Like previous weeks, we’re looking at spending about 20 minutes on these, but not more. If it takes you less than 20 minutes to make your sketch and you’ve double checked it, go ahead and sketch something else--but as you do, look for these basic forms in the things you sketch.
Exercise: Form Drawings
Goal/Focus: Understanding basic forms and how they occupy space Materials: Sketchbook, pen or pencil Assignment: Each day, do a drawing of three or more of the basic forms in different arrangments. Arrange them in front of each other, stacked, lined up, or whatever way you can think of. Try different viewing levels--look down on them from above, or place them at eye level, or above your eye level. Spend about 20 minutes on each drawing. If you have extra time or want to do more sketching, look for these forms in everyday object. Draw the object as these basic forms before breaking it down further into specific details--draw a book first as a box/ rectangular prism, draw a vase first as a cylinder, etc. Have fun! Happy Labor Day! Last week, I started a project I've been thinking about for awhile now. Each Monday, I'll be posting on my blog a basic drawing exercise that can help you to learn to see and draw more accurately. On Friday, I'll post pictures of the sketches I made. Last week's assignment was on pre-instruction drawings. I won't be posting mine here for a couple of reasons--if they were here, I would look back at them (I probably look at my blog more than anybody else), and part of the fun of doing pre-instruction drawings is being surprised at your progress when you look back at them after weeks of work. Second, since I have already had a LOT of art instruction, I don't think it would be fair to show mine as examples of what a real drawing done before any art instruction would look like. I think I may post them at the end of this series, though, to see if I made any progress through doing these exercises. I want to introduce the exercise by doing a sort of "in class" activity. I'm going to intentionally leave spaces you'll have to scroll past to see the final "solution". Am I being vague enough? I did this activity with a group of twelve year old girls last week, and it took about 45 minutes start to finish--so do this when you have a little chunk of time and don't rush through it. To start this activity, print out these three pages. They need to be in proportion for the activity to work, so don't fiddle around with the printing size options (or if you do, do it the same for all three.)
Now you have all you need to do this activity. You know its a puzzle, you have your pieces, your frame, and your reference picture. Ready.... Go. You probably figured out by now that this is not a jigsaw puzzle. What kind of puzzle IS it? That is for you to figure out. Some people see the solution quicker than others. If you're feeling stuck, here are a few hints. I'll make the text white so you have to highlight it to see it. 1. Start with the corners. 2. None of the black pieces will touch each other. 3. See if you can line up a black piece with one of the white spaces in the chair picture. Then, place it in that same place in your frame. Think you've got it? Here is the solution:
I call this a Negative Space puzzle. I got the idea for it by combining a couple of activities suggested in Betty Edward's book Drawing on the Right Side of the Brain, though this specific activity is my own way of showing the concept. And what concept is that, exactly? And how does a puzzle help me learn to draw? We're getting to that. Actually, it's the next part of the activity. I want to take your puzzle pieces off of your puzzle frame. Place your frame and your reference picture side by side. Now, using the picture of the chair as reference, draw where each of the puzzle pieces should be. DO NOT think to yourself, "I am drawing a chair." Instead, think, "I am drawing those puzzle pieces." Think of those empty pieces as the actual physical thing you are drawing--think of the real puzzle piece that you held in your hand. That is what you are drawing. To keep yourself thinking about the pieces instead of the chair, it can help you to turn your picture upside-down and draw it that way. Something else that might help you think this way is to color in the puzzle piece spaces, and leave the chair space blank. Ready, go. How does it look? Many people who are introduced to this concept for the first time are surprised at how much more accurate their drawings are. How can such an odd way of thinking make your drawing more accurate? It seems like thinking about the chair should make your drawing look more like a chair, but that isn't how it works. Before we learn to draw, we often think in symbols. Symbols such as these: The thing is, nobody's eye is actually a football shape with a circle in the middle. Nobody's house is a square with a triangle on top. There isn't a tree that is actually a puff ball with a pole holding it up. These are simplified shapes that represent the idea of the thing, but they aren't what these things actually, realistically look like.
Don't get me wrong, these symbols can be useful--but not when you want to learn to actually understand what you see and draw it accurately. To do that, you have to move past the symbol and see what you are actually drawing. You need to stop thinking "chair" and start thinking "a group of specific abstract shapes". By focusing on where the chair isn't--the negative spaces, our puzzle pieces--we see more accurately what shape the chair itself takes, rather than simplifying it into a symbol. Exercise: Negative Space Drawing Goal/Focus: Drawing accuracy, seeing past the symbol Materials: Pencil, eraser, sketchbook Assignment: For at least 20 minutes a day, draw in your sketchbook. Do these drawings from life. Draw the negative space around an object or group of objects. Some ideas of good subjects for negative space drawings might be: Furniture, like a chair, table, or stool Plants or trees Stacks or groups of things--a stack of books, a bowl of fruit Other somewhat complex objects with overlapping pieces--a bike, a lamp, a musical instrument Don't limit yourself to these ideas--draw what you want. But as you draw, focus on drawing the spaces where your subject is NOT. Think of the empty spaces as being the actual subject you are drawing. Remember the puzzle pieces--think of them as an actual physical shape you can hold. Have fun. Its been a couple months since I used my Cricut. The poor thing has just been sitting on its shelf, waiting for the day when I would get it out again. So, since we're coming up on the nation's birthday, I decided to get out one of my star-themed crafts and post it here! Normally I try to take my pictures with light from the windows so that they look nice. Well, its very cloudy and rainy today, so you get the nice fluorescent lighting for these photos. Meh. This is loosely based on a paper ornament that has been floating around Pinterest for awhile. Here is one example. The ornament is based on a pentagon, with a half circle attached to each side. Then slits are made that enable 12 of these flower shapes to be linked together. Cool, I said. But I could do so many more cool things with this rather than just attaching a half circle to my pentagon. This is one of them. A pentagon has five sides, so instead of flowers I could use... Stars. You need 12 to make one of these. I used three different colors for my patriotic star ball--5 red, 5 grey, and 2 blue. (Pattern at the bottom of the post.) I started with 1 of my blues and my 5 greys. To start, just find the slit in one grey start and the blue star and slide them together. (Yes, the slits are hard to see. Sorry. I'm blaming the fluorescent lighting) Add another grey one.... Keep going around the blue star, linking each grey one, until you have a kind of star dome. I bet you can guess what you're going to do with your 6 other stars BUT before you do, make sure you have the slits in your blue star facing the same direction as you did with the first dome you put together. Here my slits are facing counter-clockwise, so I'm going to make sure to keep them going that same direction when I link up my red ones. If you get it wrong its no big deal since we aren't using any glue, its just annoying to have to do it all over again. Now just link up the red stars around the blue one like you did before with the grey ones. And then you have two star dome things! The next part is the trickiest. You have to link your two domes together. Make sure when you start out that you aren't trying to just link one red star with one grey star--each of the two open points needs to link to a different star. See? It's helpful at this step to remember, BEND, don't rip! Paper is flexible and you can use that to help you. Get them all linked up and then.... voila! A ball made of stars! Here are the patterns. I would suggest using cardstock to make these, as regular printer paper isn't as strong.
So, St. Patrick's day kind of snuck up on me this year. Sorry. I made a super cool paper cauldron thingy to be a pot of gold... and then never made up any instructions for it. But that one doesn't have to be for St. Patrick's day. Maybe I'll put it together in time for Easter. It can be a basket. This craft, however, is pretty St. Patrick's day specific. And its not too complicated! Well, compared to the other things I've made. If you made almost any other craft I've posted here it will be easy, because it is based on the very same principles.
As you can see from the string in the photo at the top, I strung mine into a necklace, but you can use these for any kind of St. Patrick's decorating you want to do.
Does the shape look familiar? That might be beecause you can use the same shape for a slightly different craft on Valentine's day: http://www.sarahluann.com/blog/paper-heart-baskets So maybe St. Valentine and St. Patrick were friends or something ;-) Have fun! Awhile ago I said I was going to figure out a way to explain how to put together my heart box. And while it's really simple, I didn't know how to do it with images alone. So, I tried a video. Its not a very good one, but it works? Maybe. You can print the files at the bottom and cut them out, then watch the video. The video starts with a box that is all cut out.
You know those paper heart baskets I posted awhile ago? Part of the reason I bothered to put that together was so it would stop bothering me. The concept had been rolling around in my head for weeks, and I thought if I actually made it and tried it out and made sure it worked, then I could forget about it. So, I made the paper heart baskets and said, I'm done. Well, since I made and tested one thing using interlocking hearts, my brain decided to go crazy and think up more. Because its uncooperative like that. So. I made a card, which is only a slightly altered form of a couple cards I've seen on pinterest, here and here. But after I made it, I thought, wow, I could make a cool box using this. But right now you only get to see the card because I'm still trying to figure out the best way to explain how to put the box together. Because it's actually very simple and requires absolutely zero glue. Yep. And its actually really simple to put together, once you know the trick. Anyway. All you get is the heart card for now. Knock yourself out. Oh, and Happy Valentines Day.
Lately my mind has been going crazy thinking of all kinds of things I can make with shapes and half shapes that can slide together. I have a whole box of things I've made but have yet to find time to explain to anyone else how to make. I tried (and maybe failed, or at least didn't succeed completely) to explain how to put together my 12-sided ornament. Most of the other shapes are similar to that one, in that their main function is decorative. Maybe I'll get them out again in time for next Christmas. Which reminds me I never did show anyone how I made my cool triangle paper chain that I put on our tree here. Sigh. Anyway. When my brain was doing that "what are ALL THE THINGS we can make with half-shapes interlocking" thing it realized that a heart was a conveniently symmetrical and simple shape we could do stuff with. Even do USEFUL stuff, not just this "well that looks cool but what do we DO with it now that we've made it" stuff. Well, relatively. These still mostly just look cool. Anyway. I'm just going to stop talking and show you what I made. I give you... PAPER HEART BASKETS. I made two variations--one with three sides and one with four. I would really suggest making them with cardstock so that they're stiff enough to, you know, actually hold something. And, of course, the bigger you make it the more space it has to bend, so enlarge at your own risk. And here they are.
An early Happy Valentines Day to you all!
Time to make dinner. Today is our ward Christmas party, and the YW organization was in charge of decorations for the walls. We decided to decorate the walls with cut out starts. It might even have been my idea. To make it easier to teach people how to fold paper with the right angles, I made patterns to use as a guide. Though I've been folding paper snowflakes/stars for years without a pattern, I even found myself using the pattern, because it made things so much faster than just the guess-and-check method. Then I thought, why not make the patterns avaliable for everyone? Here they are: ![]()
|
Your email will not be shared with anyone. It will only be used for updates from me, and you can unsubscribe at any time.
Want a Print?
Take a look at my print shop on INPRNT.com Categories
All
Archives
September 2020
|