illustrated by Sarah LuAnn
  • Portfolio
    • Picture Books
    • Covers
    • Middle Grade
      • Return of the Thief
      • A Kernel of Magic
      • Backpack Dragon
      • A Groundbreaking Journey
    • Comics
    • Maps
    • Stand-alone images and prints
    • Cricut Cartridges
  • Art Classes
    • Drawing Fundamentals
    • Beginning Painting
  • Prints
  • About Me
  • Contact
  • Blog
    • Dummy Worksheets

Future Bookworm T-shirt

2/22/2016

2 Comments

 
Once in awhile you gotta just do a project that is totally for you. Not a job, a "portfolio" project, just something YOU want.

Which I did. :-)

I had this iron-on sitting with my cricut supplies for over a year. I ordered it to make an awesome personalized t-shirt for my dad, but I had a bunch left over. I had no ideas for what I wanted to do with it, though, so it just sat.

Until now.
Picture
Picture
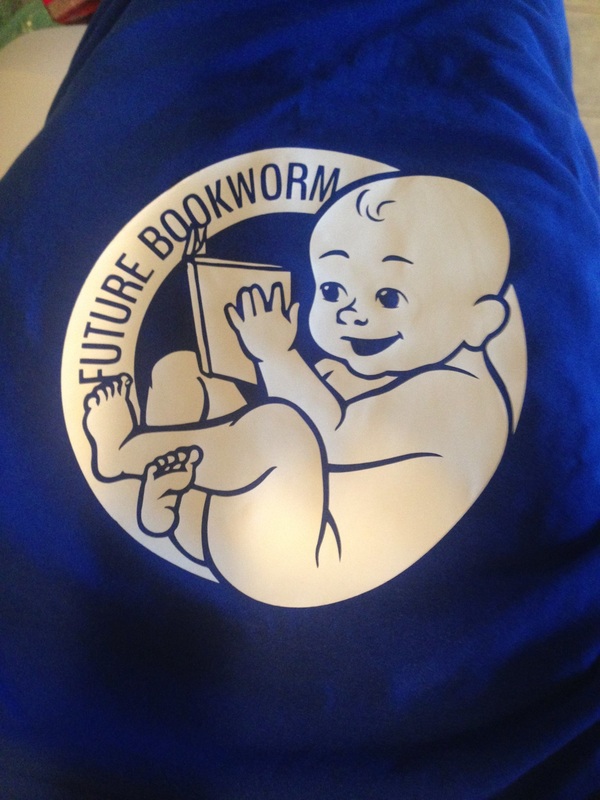
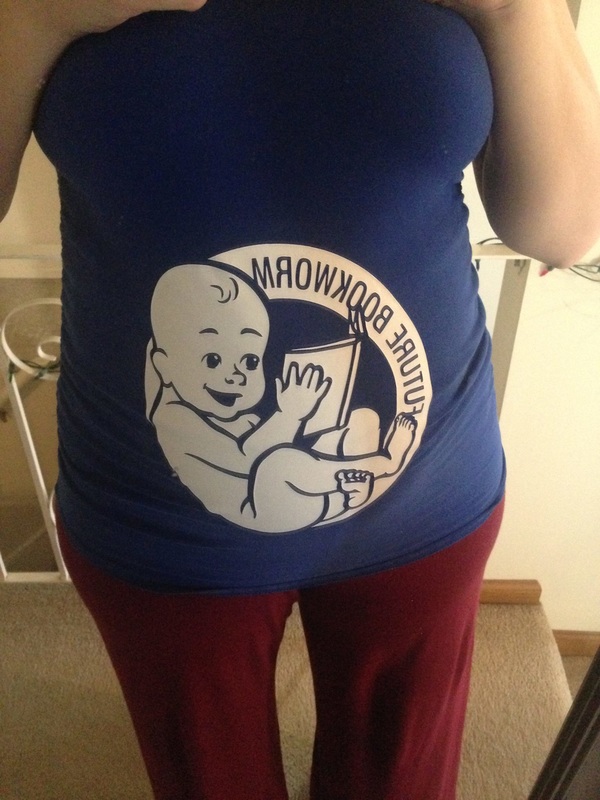
Awww.

But seriously, with two bookworm parents I don't see how this could be anything but entirely accurate.

In case anyone cares, I thought I'd give a few details about the process of making this image. If you don't care, well... go away.

First, sketches. I've been doodling babies for awhile (its kind of on my mind) and I've been wanting to make this shirt for awhile. I finally started experimenting with different positions and trying to find what worked best.
Picture
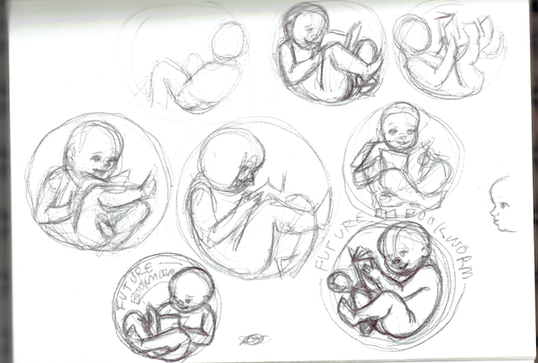
You can see that I chose the one on the bottom right. The bottom left one was cute too, but I wanted something that looked a bit more fetal, if that makes sense.

So I scanned it into the computer and traced it in Photoshop and cleaned it up.

Picture
I then took it into Illustrator and cleaned it up even more. Lots of cleaning.
Picture
I saved my image as an SVG so I could take it into Cricut Design Space and cut it out.
Picture
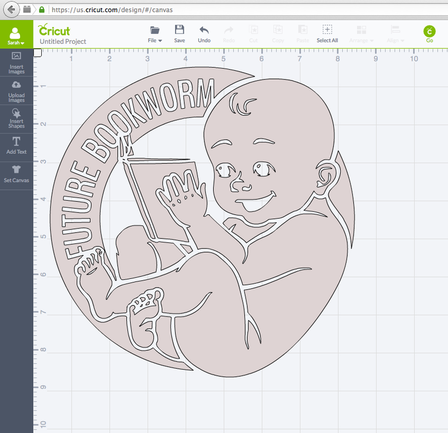
This is the video I watched to make sure I did it all right: https://www.youtube.com/watch?v=DnQXs2Z163c

You'll notice if you look closely at the final project that I kind of messed up a bit on the "weeding" step. Specifically, I didn't get the little dimples in the baby knuckles and the lines in the ears or on the foot weeded out, so they're filled in on the final product. OOPS. I'll have to pay closer attention next time. And I really liked those cute baby knuckle dimples. My bad.

I ironed it on and--voila! Awesomest maternity shirt you ever did see.

When Rich gets home maybe I'll remember to get him to take an actual, like, good photo of me in this shirt, at an angle where you can actually see my belly (I swear I have one!). For now you get a badly lit awkward mirror shot because THAT IS WHAT I CAN DO RIGHT NOW. You're welcome.
Picture
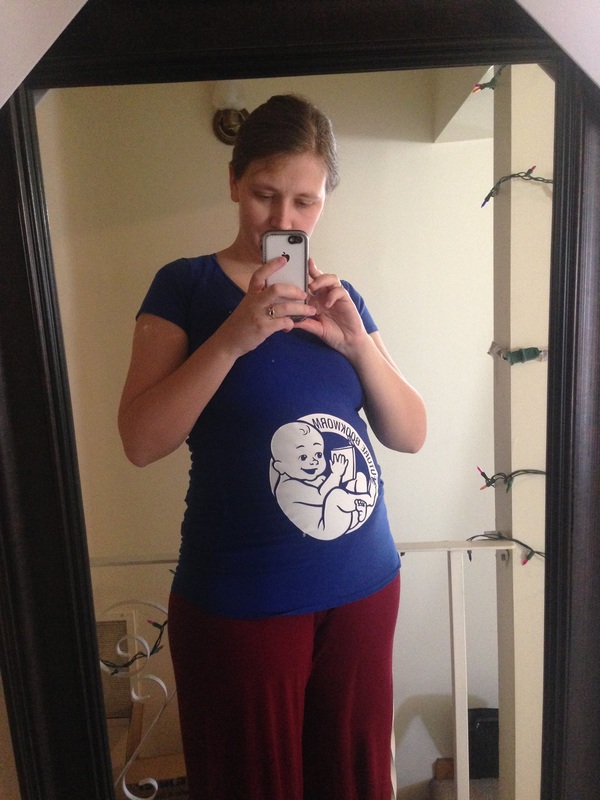
(And no, of course we haven't taken the protective cardboard stuff off of the corners of our mirror. Why would we do that? And why would you ever take down Christmas lights anyway?)
2 Comments

New Craft!

6/9/2015

0 Comments

 
Its been a couple months since I used my Cricut. The poor thing has just been sitting on its shelf, waiting for the day when I would get it out again. So, since we're coming up on the nation's birthday, I decided to get out one of my star-themed crafts and post it here!

Normally I try to take my pictures with light from the windows so that they look nice. Well, its very cloudy and rainy today, so you get the nice fluorescent lighting for these photos. Meh.

This is loosely based on a paper ornament that has been floating around Pinterest for awhile. Here is one example. The ornament is based on a pentagon, with a half circle attached to each side. Then slits are made that enable 12 of these flower shapes to be linked together.

Cool, I said. But I could do so many more cool things with this rather than just attaching a half circle to my pentagon. This is one of them. A pentagon has five sides, so instead of flowers I could use...

Picture
Stars. You need 12 to make one of these. I used three different colors for my patriotic star ball--5 red, 5 grey, and 2 blue. (Pattern at the bottom of the post.)
Picture
I started with 1 of my blues and my 5 greys. To start, just find the slit in one grey start and the blue star and slide them together. (Yes, the slits are hard to see. Sorry. I'm blaming the fluorescent lighting)
Picture
Add another grey one....
Picture
Keep going around the blue star, linking each grey one, until you have a kind of star dome.
Picture
I bet you can guess what you're going to do with your 6 other stars BUT before you do, make sure you have the slits in your blue star facing the same direction as you did with the first dome you put together. Here my slits are facing counter-clockwise, so I'm going to make sure to keep them going that same direction when I link up my red ones. If you get it wrong its no big deal since we aren't using any glue, its just annoying to have to do it all over again.
Picture
Now just link up the red stars around the blue one like you did before with the grey ones.
Picture
And then you have two star dome things!

The next part is the trickiest. You have to link your two domes together. Make sure when you start out that you aren't trying to just link one red star with one grey star--each of the two open points needs to link to a different star. See?
Picture
It's helpful at this step to remember, BEND, don't rip! Paper is flexible and you can use that to help you.

Get them all linked up and then.... voila! A ball made of stars!
Picture


Here are the patterns. I would suggest using cardstock to make these, as regular printer paper isn't as strong.


patternblack.jpg
File Size: 80 kb
File Type: jpg
Download File

patterncolors.jpg
File Size: 112 kb
File Type: jpg
Download File

Picture
Picture
0 Comments

Interlocking Shamrock

3/17/2015

2 Comments

 
So, St. Patrick's day kind of snuck up on me this year. Sorry. I made a super cool paper cauldron thingy to be a pot of gold... and then never made up any instructions for it. But that one doesn't have to be for St. Patrick's day. Maybe I'll put it together in time for Easter. It can be a basket.

This craft, however, is pretty St. Patrick's day specific.
Picture
And its not too complicated! Well, compared to the other things I've made. If you made almost any other craft I've posted here it will be easy, because it is based on the very same principles.
Picture
Picture
shamrockpiecesbw.jpg
File Size: 60 kb
File Type: jpg
Download File

Picture
shamrockpiecescolor.jpg
File Size: 85 kb
File Type: jpg
Download File

Picture
As you can see from the string in the photo at the top, I strung mine into a necklace, but you can use these for any kind of St. Patrick's decorating you want to do.

Does the shape look familiar? That might be beecause you can use the same shape for a slightly different craft on Valentine's day:
http://www.sarahluann.com/blog/paper-heart-baskets

So maybe St. Valentine and St. Patrick were friends or something ;-)

Have fun!
2 Comments

Valentines Centerpiece

2/7/2015

0 Comments

 
I tell you what, Valentines better come soon, because then I can tell my brain that it can STOP thinking up ways to make things with hearts.

Another week to go, I guess. Ah, well. I'll survive.

I guess my brain was saving the simplest stuff for last, because this one is really easy. I didn't even bother to take pictures to make instructions. OK fine, thats mostly because right now I'm lazy, but also because you don't need them. 

Ok, here goes nuthin'. Super simple-yet-cool-looking DIY centerpiece decoration thing for valentines. Because why not.
Picture
And I even made a little template. You can do this with any kind of heart, though. Or actually with any shape your little heart desires. (See what I did there?  Haha. Ok, lame joke. Moving on.)

Also! This concept is super versatile, and not just in the shape you use. As long as you cut at least three pieces, you're good. I did four because... I like squares? It just seemed like a nice, even number. I guess you could even do it with two, if you made it go around something fairly narrow. Like one of those little vases you put a single rose in or something. Or on the rod things that hold up stair banisters. Which technically wouldn't be a centerpiece anymore, but I guess thats my point. You can use this in so many ways!

Ok I'll stop talking now and just give you the dang template for the Valentine Centerpiece. In case you wanted it. Because maybe you were thinking of doing your own thing instead.
Picture
heart-centerpiece.jpg
File Size: 60 kb
File Type: jpg
Download File

Take a look at the photo above to get an idea of what we're doing here.
All you need to do is find a slit that faces down, and slide it over a slit that faces up. Make sure you slide the slits all the way together, to the end of each slit. Do this until you have all your pieces are linked together. Once all your pieces are linked together, link the ends together the same way. Do a little pushing, pulling, and nudging to get your pieces to stand just how you'd like them to.

This would be really easy to jazz up in simple was. Maybe try letting kids draw on the hearts first. Or you could try gluing doilies or other lightweight valentines decorations on the hearts. Maybe some paper flowers. Maybe put a vase in the center full of roses.

Or you could just say you're going for the simple look and leave the hearts as-is. They do pretty well on their own.

Ta-da! Easy centerpiece!
0 Comments

How to assemble a heart box. 

1/23/2015

0 Comments

 
Picture
Awhile ago I said I was going to figure out a way to explain how to put together my heart box. And while it's really simple, I didn't know how to do it with images alone. So, I tried a video. Its not a very good one, but it works? Maybe.

You can print the files at the bottom and cut them out, then watch the video. The video starts with a box that is all cut out.
Picture
heartboxprintbw.jpg
File Size: 83 kb
File Type: jpg
Download File

Picture
heartboxprintcolor.jpg
File Size: 201 kb
File Type: jpg
Download File

0 Comments

Heart Card

1/14/2015

1 Comment

 
You know those paper heart baskets I posted awhile ago? Part of the reason I bothered to put that together was so it would stop bothering me. The concept had been rolling around in my head for weeks, and I thought if I actually made it and tried it out and made sure it worked, then I could forget about it. So, I made the paper heart baskets and said, I'm done.

Well, since I made and tested one thing using interlocking hearts, my brain decided to go crazy and think up more. Because its uncooperative like that.

So. I made a card, which is only a slightly altered form of a couple cards I've seen on pinterest, here and here. But after I made it, I thought, wow, I could make a cool box using this.

But right now you only get to see the card because I'm still trying to figure out the best way to explain how to put the box together. Because it's actually very simple and requires absolutely zero glue. Yep. And its actually really simple to put together, once you know the trick.

Anyway. All you get is the heart card for now. Knock yourself out.

Oh, and Happy Valentines Day.
Picture
Picture
cardprint.jpg
File Size: 52 kb
File Type: jpg
Download File

1 Comment

Paper Heart Baskets

1/5/2015

4 Comments

 
Lately my mind has been going crazy thinking of all kinds of things I can make with shapes and half shapes that can slide together. I have a whole box of things I've made but have yet to find time to explain to anyone else how to make. I tried (and maybe failed, or at least didn't succeed completely) to explain how to put together my 12-sided ornament. Most of the other shapes are similar to that one, in that their main function is decorative. Maybe I'll get them out again in time for next Christmas. Which reminds me I never did show anyone how I made my cool triangle paper chain that I put on our tree here.

Sigh.

Anyway. When my brain was doing that "what are ALL THE THINGS we can make with half-shapes interlocking" thing it realized that a heart was a conveniently symmetrical and simple shape we could do stuff with. Even do USEFUL stuff, not just this "well that looks cool but what do we DO with it now that we've made it" stuff. Well, relatively. These still mostly just look cool.

Anyway. I'm just going to stop talking and show you what I made.

I give you... PAPER HEART BASKETS.
Picture
I made two variations--one with three sides and one with four. I would really suggest making them with cardstock so that they're stiff enough to, you know, actually hold something. And, of course, the bigger you make it the more space it has to bend, so enlarge at your own risk.

And here they are.
Picture
Picture
heartbasket1.jpg
File Size: 55 kb
File Type: jpg
Download File

heartbasket2.jpg
File Size: 57 kb
File Type: jpg
Download File

Picture
Picture
Picture
Picture
heartbasket3.jpg
File Size: 60 kb
File Type: jpg
Download File

heartbasket4.jpg
File Size: 58 kb
File Type: jpg
Download File

Picture
Picture
An early Happy Valentines Day to you all!

Time to make dinner.
4 Comments

Ornament Painting

12/31/2014

0 Comments

 
Awhile back I made a fold and cut ornament... which I never posted or gave instructions for. Eventually I might.

And then I thought, thats a simple thing to paint. It would be good to start up again with something simple.

So, I painted it.

It was a good reminder of how much I love painting, and how much I miss it. And how terribly, horribly, completely rusty I am at it.

I started it one night in November and never got back to it until last night, when I decided to be done with it. Not because its the best it can be and completely finished, but because it served its purpose--it was a reason to get the paints out, and to remember how fun painting is, and how hard.

Here is how it looked, at various points in its life. I noticed too late that when I held the iphone too close to the painting it made the whole picture look cold, with a sort of grey-blue cast over the whole thing. Something to watch for next time.

Picture
Picture
Picture
Picture
Picture
0 Comments

Snowflake folding pattern

12/13/2014

2 Comments

 
Today is our ward Christmas party, and the YW organization was in charge of decorations for the walls. We decided to decorate the walls with cut out starts. It might even have been my idea.

To make it easier to teach people how to fold paper with the right angles, I made patterns to use as a guide. Though I've been folding paper snowflakes/stars for years without a pattern, I even found myself using the pattern, because it made things so much faster than just the guess-and-check method.

Then I thought, why not make the patterns avaliable for everyone?

Here they are:
snowflake-pattern.jpg
File Size: 98 kb
File Type: jpg
Download File

Picture
2 Comments

Christmas ornament

12/3/2014

2 Comments

 
Picture
A couple weeks ago, I invented this ornament by accident. I was looking at two different pins on pinterest when I created it, this one, and this one. One makes a dodecahedron (12 sided 3D shape) out of hexagons which interlock, the other is a octahedron (8 sided 3D shape) of folded paper, based on a diamond shape. I wanted to try making an octahedron out of pieces that interlocked like the first one did.

But I didn't think it all through before diving in. I discovered that, with the pieces the way I had configured them, it didn't make an octahedron as I'd planned. I quickly realized, however, that I could make my shape work to make a different type of 12 sided ornament. (I did later figure out the right way to make the octahedron :-)

I decided to give my accident ornament away to anyone who wants it for Christmas. I tried to make the instructions clear, but after sending them out to friends and family, it seems that some of them could understand them and some couldn't. I'm not sure how to make them clearer--I invented this by accident, remember, I just did what worked and it happened. I don't really know how to explain that. So if you want, print these out and give it a try. If you print it on cardstock your final ornament will be more sturdy, but it will be more flexible and easier to assemble if you use regular paper--your choice.
ornament-pieces.jpg
File Size: 99 kb
File Type: jpg
Download File

ornament-instructions.jpg
File Size: 194 kb
File Type: jpg
Download File

Picture
Picture
2 Comments
<<Previous

    Let me email you a Creativity Workbook full of fun drawing exercises:

    * indicates required
    Your email will not be shared with anyone. It will only be used for updates from me, and you can unsubscribe at any time.

    Want a Print?

    Take a look at my print shop on INPRNT.com

    Categories

    All
    Ambigrams
    Art
    Books
    Comic
    Craft
    Creativity
    Deep Thoughts
    Drawing Exercises
    Dummy Book
    Folding
    Goals
    Holiday
    Illustration
    Inktober
    Master Copy
    Painting
    Paper
    Personal
    Polyhedron
    Portrait
    Printable
    Progress Photos
    Snowflake
    Sourdough
    The Artist And The Engineer
    Whats Your Superpower?

    Archives

    September 2020
    March 2020
    January 2020
    December 2019
    July 2019
    June 2019
    March 2019
    February 2019
    January 2019
    October 2018
    September 2018
    August 2018
    June 2018
    May 2018
    April 2018
    March 2018
    December 2017
    November 2017
    September 2017
    August 2017
    June 2017
    April 2017
    February 2017
    January 2017
    December 2016
    November 2016
    October 2016
    May 2016
    April 2016
    March 2016
    February 2016
    December 2015
    November 2015
    October 2015
    September 2015
    August 2015
    July 2015
    June 2015
    May 2015
    April 2015
    March 2015
    February 2015
    January 2015
    December 2014
    November 2014

    RSS Feed

All content on this site was created by Sarah LuAnn Perkins. Do not use without permission.
Copyright © 2020
  • Portfolio
    • Picture Books
    • Covers
    • Middle Grade
      • Return of the Thief
      • A Kernel of Magic
      • Backpack Dragon
      • A Groundbreaking Journey
    • Comics
    • Maps
    • Stand-alone images and prints
    • Cricut Cartridges
  • Art Classes
    • Drawing Fundamentals
    • Beginning Painting
  • Prints
  • About Me
  • Contact
  • Blog
    • Dummy Worksheets