illustrated by Sarah LuAnn
  • Portfolio
    • Picture Books
    • Covers
    • Middle Grade
      • Return of the Thief
      • A Kernel of Magic
      • Backpack Dragon
      • A Groundbreaking Journey
    • Comics
    • Maps
    • Stand-alone images and prints
    • Cricut Cartridges
  • Art Classes
    • Drawing Fundamentals
    • Beginning Painting
  • Prints
  • About Me
  • Contact
  • Blog
    • Dummy Worksheets

Basic Forms

10/28/2015

0 Comments

 
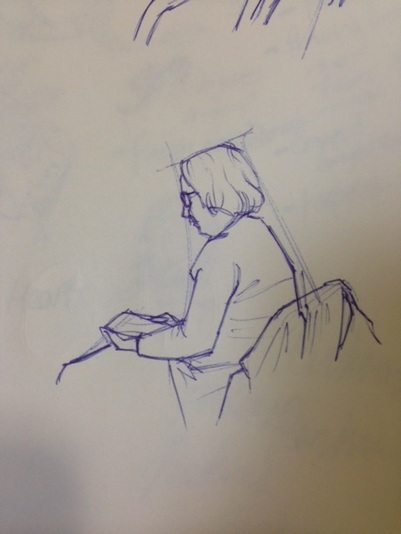
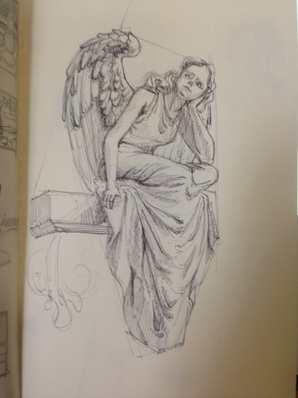
So, this post is late. Not just a day late-two whole days late. How could I do such a thing? Well, on Monday I was very, very sick. I don’t think I even touched my computer that day--that sick. I didn’t do much of anything that day, actually. Then Tuesday was a recovery and catch-up day. So that brings us to Wednesday.

But I AM here, and I’m getting this post up. Better late than never, right?

And this is going to have to be another 2-week-er. Because that is how my life is going around now.


Envelope drawings were fun this last week. I did mine in ball point pen, which is really a comfort sketching medium for me--yes, I’m more comfortable sketching in pen than in pencil. My highschool teacher had us always sketch in pen and I got used to it. The nice thing about ball point pen is that you can push soft for a light line, and push hard for a dark line. In some of these my “envelope” lines are more visible than others, but you’ll just have to trust me on this one--I drew an envelope for these.
Picture
Picture
Picture
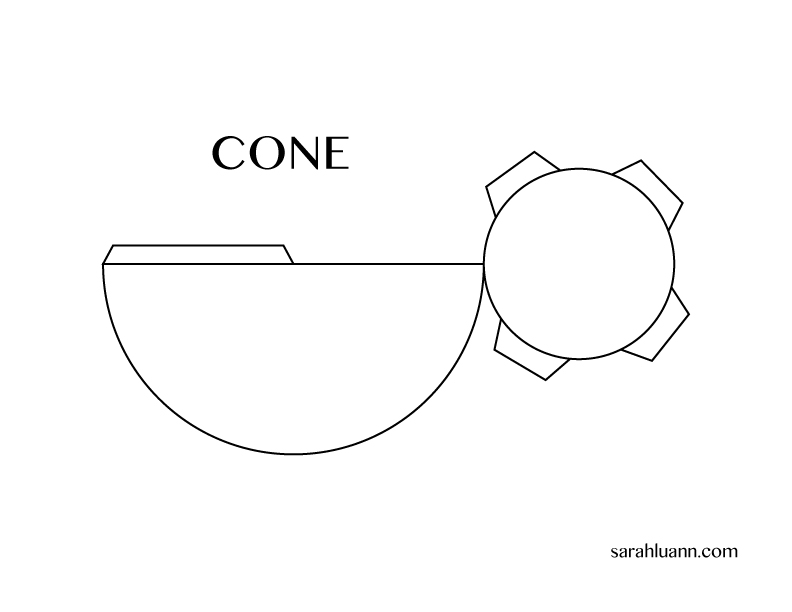
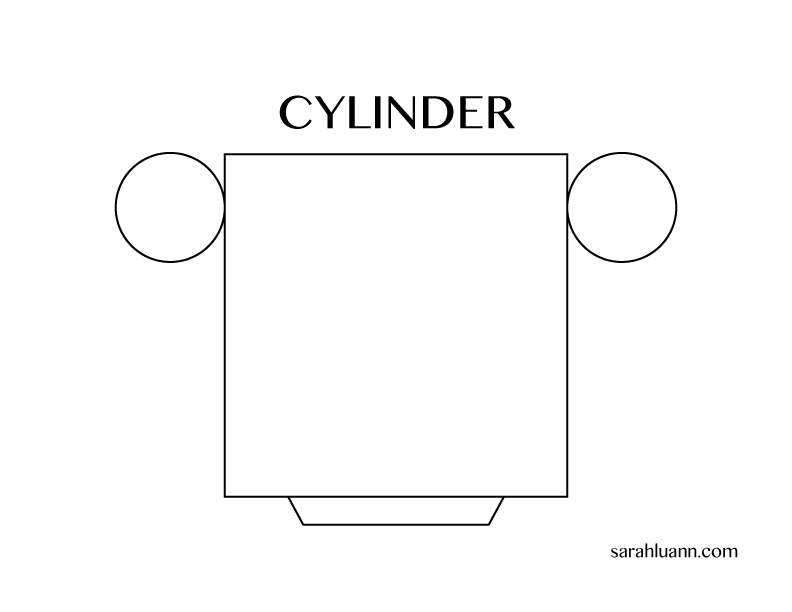
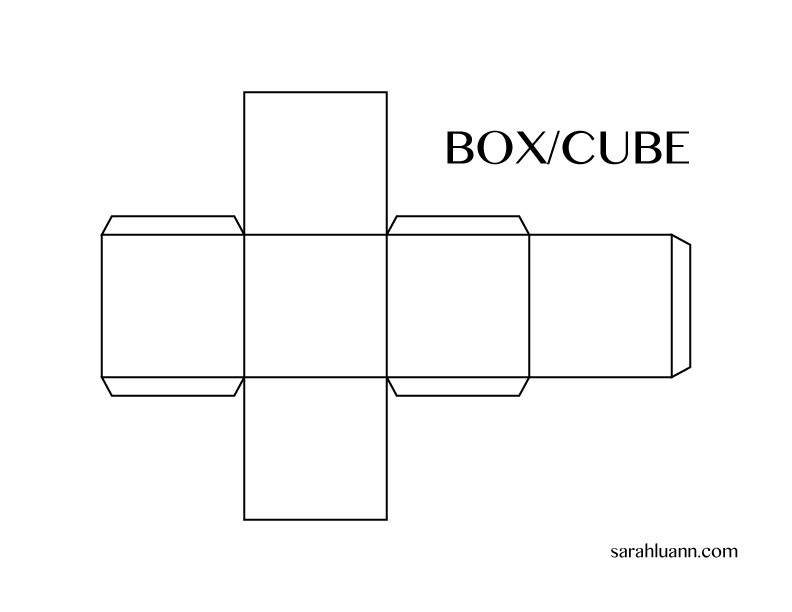
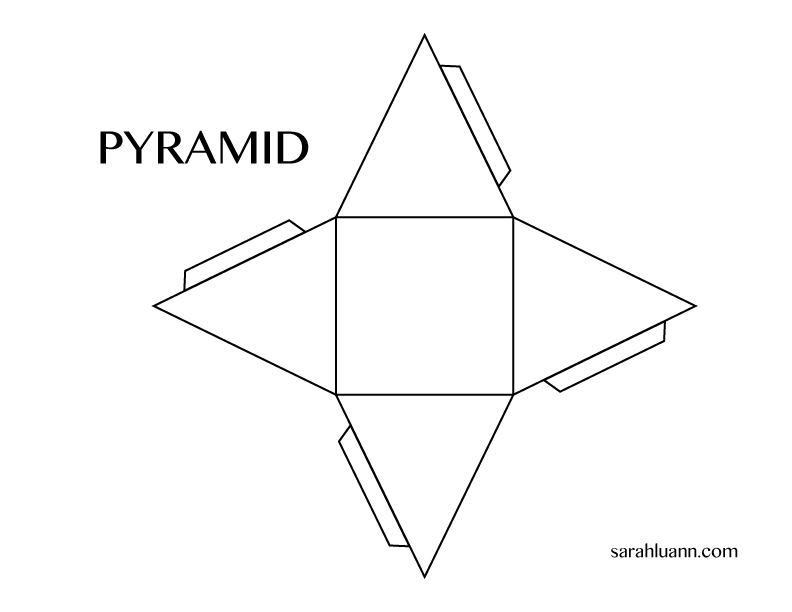
This week I want to start transitioning into skills that will help you (and me!) draw from imagination. Most of the exercises we’ve done so far really depend on having your subject right in front of you. But I’m an illustrator, and I can’t always find a real live three dimensional example of what I am drawing. I have to use my knowledge built up from drawing from life (As we’ve been doing for the last few weeks, right?) to imagine how something might look.

So this week I’ve decided to try an exercise I’ve actually never done before, but seen recommended elsewhere. I’m hoping that it will be as helpful as I’ve heard it is. If not, well, I’ll keep looking for something to teach these principles.

Everything we see can be simplified into combinations of certain basic 3-dimensional forms. Legs can be simplified to cylinders, an apple is basically a sphere, a book is a box shape, etc. Understanding these basic types of forms and how they occupy space can help us to simplify the things we imagine into manageable forms we can understand and draw. So this week, we’re going to get to know those forms.

Find or make each of these, all in one color: a cone, a cylinder, a sphere, a box or cube, and a pyramid. I will make some paper patterns (except I can’t really do a sphere), but you may have things around the house that will work--just wrap a can of soup in paper and you have a white cylinder. A white ping pong ball needs no alteration, there is your sphere. They don’t even need to be white, but I would prefer that they are all one solid color, so that the form differences are the important thing, rather than color or value or pattern.

Each day, draw three or more of your forms at different angles and arrangements. Pay attention to what happens to each face when they are above your eye level versus below, How they look when stacked on top of each other, in different lighting situations, etc. Be creative. Since we are mostly worried about the forms, don’t get too caught up in the shading--you can make an indication of where the shadows are, but don’t spend forever on this. Like previous weeks, we’re looking at spending about 20 minutes on these, but not more.

If it takes you less than 20 minutes to make your sketch and you’ve double checked it, go ahead and sketch something else--but as you do, look for these basic forms in the things you sketch.

cone.jpg
File Size: 32 kb
File Type: jpg
Download File

cylinder.jpg
File Size: 25 kb
File Type: jpg
Download File

cube.jpg
File Size: 25 kb
File Type: jpg
Download File

pyramid.jpg
File Size: 40 kb
File Type: jpg
Download File

Exercise: Form Drawings

Goal/Focus:
Understanding basic forms and how they occupy space

Materials: Sketchbook, pen or pencil

Assignment: Each day, do a drawing of three or more of the basic forms in different arrangments. Arrange them in front of each other, stacked, lined up, or whatever way you can think of. Try different viewing levels--look down on them from above, or place them at eye level, or above your eye level. Spend about 20 minutes on each drawing.

If you have extra time or want to do more sketching, look for these forms in everyday object. Draw the object as these basic forms before breaking it down further into specific details--draw a book first as a box/ rectangular prism, draw a vase first as a cylinder, etc.

Have fun!
0 Comments

the Little Prince

10/19/2015

0 Comments

 
No drawing exercise this week. If you remember, I did say that I would be going every other week through October because of business. And I must say, things have become even busier than I thought they would, so I am really glad that I gave myself that off.

But even though there was no drawing exercise today, I wanted to get SOMEthing up. So here is a little something I've been working on. I'm fairly happy with it, but I may rest it for awhile and then come back and tweak it later--sometimes you just need to stop looking at things in order to see what you want to fix, you know?

So, without further ado, I give you... the Little Prince!
Picture
0 Comments

General to Specific

10/13/2015

0 Comments

 
No, I didnt get this post up yesterday. Yes, I should have. But I was at the Norman Rockwell Museum. Looking at paintings by, you know…. Norman Rockwell. And life has been kind of crazy these last couple weeks anyway. So I’m only kind of sorry for being late.

I, for one, really loved doing gesture drawings these last couple weeks. I will admit, because of the life being crazy stuff, I didn’t get to do as many as I wanted. But for me I felt that I had a real breakthrough with Gesture drawings this week. I found myself actually enjoying them, and I’ve never enjoyed gesture drawing before.

Picture
Picture
Picture
I think for me the real difference was not making myself use just a few lines to describe the movement. I kept my pen moving and massed in the entire form, rather than just focusing on edges or a single line of movement, and that is what worked for me. I never had a teacher do them that way, so the way Nicolaides explained them was very new and helpful. Everyone needs to find their own way that works I guess. Thats one reason why having multiple teachers or sources of information can be helpful.

Todays concept was explained to me in a couple different ways by different teachers I had over the years. My college teacher would always tell us in figure drawing class, “Make an envelope and put the figure in.” It took me awhile to understand what he meant by that. An envelope? Maybe I’m too literal, but I would imagine slipping a drawing into an envelope and didn’t see how that related to how I was drawing at all.

Now I understand that what he was talking about was something very practical for artists. It is a concept that my high school art teacher put into somewhat simpler terms. She would say, over and over. “Work from general to specific. General to specific. General to specific.”

What does that mean?

It means that beginning artists, and sometimes experienced ones, have a tendency to get caught up in details. When we are drawing the face, we sometimes want to dive right in and put all the eyelashes on the eye. But before that, you need to make sure you have the eye in the right place. And that the nose is in the right place. And the hair, the head, the neck.

You need to start with the overall shape, and break it down into smaller and smaller details. This is an idea that is demonstrated in the books “Drawing Made Easy” and “Practial Drawing” by E. G. Lutz. (It is also probably outlined elsewhere, but public domain books make things easy on us.)
The most important part about todays exercise is how you start it. Start by looking at the entire shape of the thing you want to draw. Decide where you want that shape to be on your paper. This the beginning (just scratching the surface) of composition, because you do NOT have to just put it in the middle of your page. Maybe it would look better towards one side or the other, or cropped in a certain way. Make that decision.

Then, very loosely give yourself a general outline to work within. Look at the pictures above from the Drawing Made Easy book--Flowers start as an ellipsis, an owl begins as a rectangle, a duck begins as two triangles. You don't have to start with a geometric shape if that doesn't make sense to you, as long as you are looking at the whole shape without worrying about any of the little details. We are NOT doing a Negative Space drawing here, but it can be helpful to look at the negative spaces just to see if you have the overall shape correct--we don’t care about all the little ins and outs of the shape yet. In the duck picture above, you notice that the triangles go around the very outer points of the shape, and then when it is refined the inner points are defined.


Once you have that, Think of the next logical way to break down your shape. For example, lets imagine you were drawing a portrait. Look at other large shapes--what is the overall shape of the hair? We don’t care about the individual hairs yet, we are looking at the entire mass. What is the overall shape of the shirt? What shape do you see formed by the neck, between the shirt and the jaw? These aren’t negative shapes, but they require a similar kind of thinking--do NOT think “hair” or “neck” or “shirt”--think “shape”.  After having a general outline of the larger shapes, find the center line of the face, and then lightly mark where the brows, eyes, nose and mouth fall. Keep moving around the picture, bringing the whole thing along step by step--don’t stop at one spot and finish it until you bring the rest of the drawing to a similar level. No eyelashes until the end.

Exercise: Envelope Drawings

Goal/Focus: Seeing large shapes, correctly placing large forms before adding details, accuracy, composition

Materials: Sketchbook and pen or pencil

Assignment:
Choose a new subject to draw each day this week. Draw from life, not photographs. Think of the overall shape of your object and where you want to place it on your page before starting. When you begin the drawing, loosely outline where you want the object to be, and then gradually break it down into smaller and smaller shapes. Spend at least 20 minutes on your drawing--move slowly, this isn't about drawing quickly, but rather about drawing accurately. 

0 Comments

    Let me email you a Creativity Workbook full of fun drawing exercises:

    * indicates required
    Your email will not be shared with anyone. It will only be used for updates from me, and you can unsubscribe at any time.

    Want a Print?

    Take a look at my print shop on INPRNT.com

    Categories

    All
    Ambigrams
    Art
    Books
    Comic
    Craft
    Creativity
    Deep Thoughts
    Drawing Exercises
    Dummy Book
    Folding
    Goals
    Holiday
    Illustration
    Inktober
    Master Copy
    Painting
    Paper
    Personal
    Polyhedron
    Portrait
    Printable
    Progress Photos
    Snowflake
    Sourdough
    The Artist And The Engineer
    Whats Your Superpower?

    Archives

    September 2020
    March 2020
    January 2020
    December 2019
    July 2019
    June 2019
    March 2019
    February 2019
    January 2019
    October 2018
    September 2018
    August 2018
    June 2018
    May 2018
    April 2018
    March 2018
    December 2017
    November 2017
    September 2017
    August 2017
    June 2017
    April 2017
    February 2017
    January 2017
    December 2016
    November 2016
    October 2016
    May 2016
    April 2016
    March 2016
    February 2016
    December 2015
    November 2015
    October 2015
    September 2015
    August 2015
    July 2015
    June 2015
    May 2015
    April 2015
    March 2015
    February 2015
    January 2015
    December 2014
    November 2014

    RSS Feed

All content on this site was created by Sarah LuAnn Perkins. Do not use without permission.
Copyright © 2020
  • Portfolio
    • Picture Books
    • Covers
    • Middle Grade
      • Return of the Thief
      • A Kernel of Magic
      • Backpack Dragon
      • A Groundbreaking Journey
    • Comics
    • Maps
    • Stand-alone images and prints
    • Cricut Cartridges
  • Art Classes
    • Drawing Fundamentals
    • Beginning Painting
  • Prints
  • About Me
  • Contact
  • Blog
    • Dummy Worksheets